

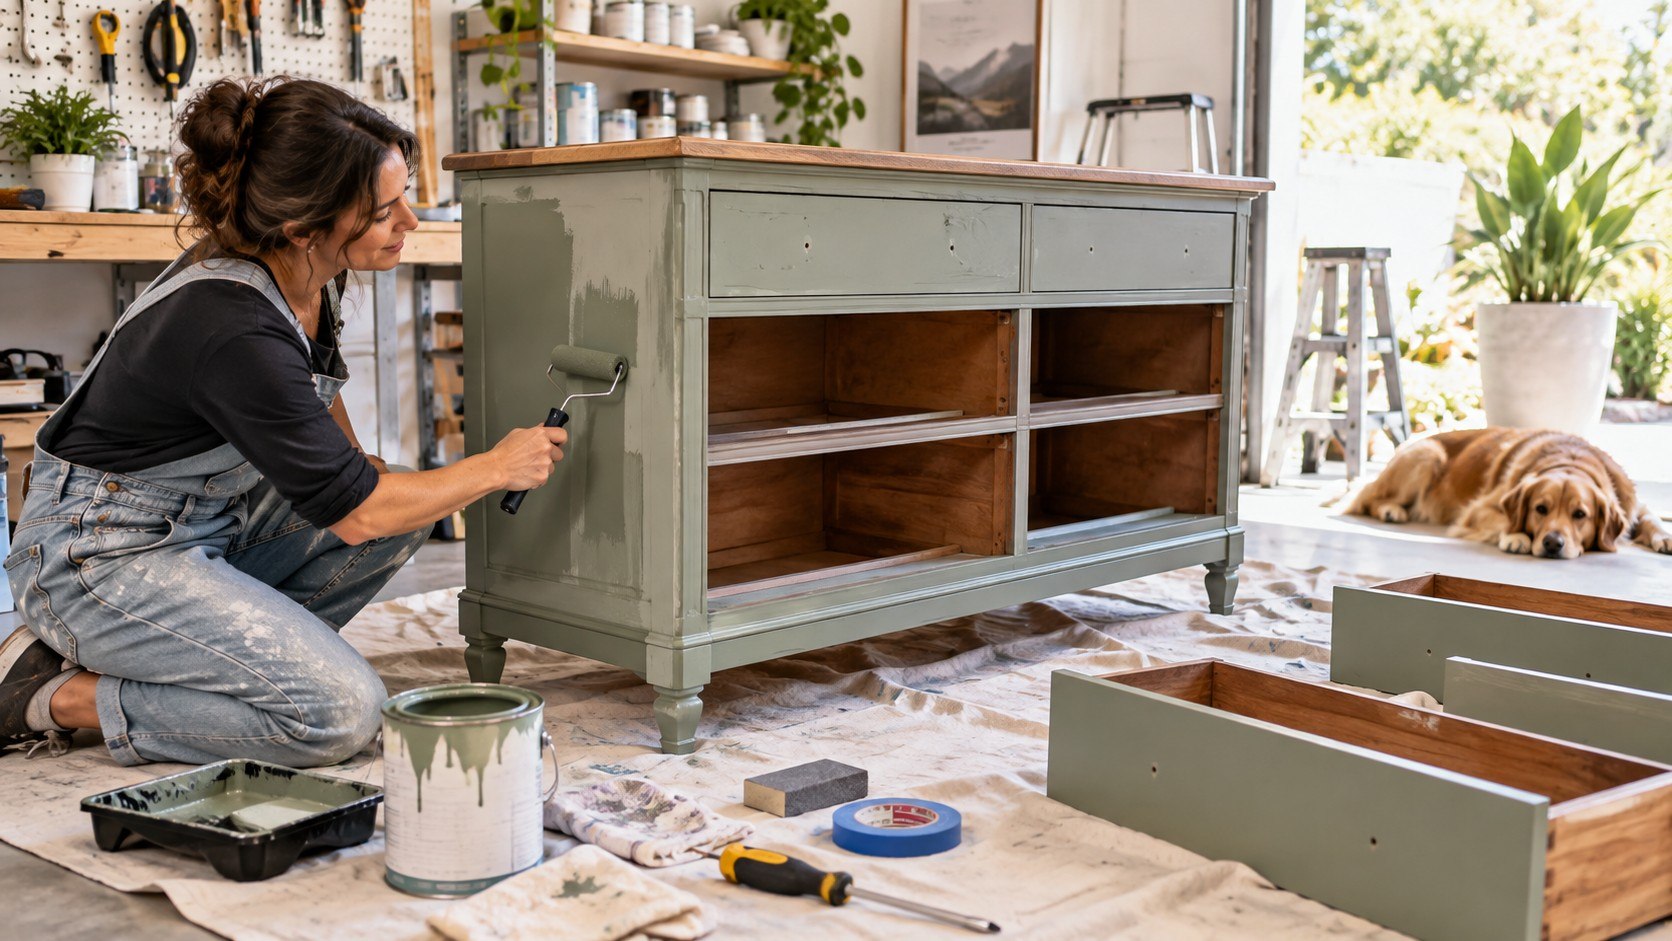
How to paint a dresser like a pro starts with cleaning, controlled sanding, the correct primer, and thin paint coats. A typical dresser needs about 1 working day plus drying and curing time. The method below works for solid wood, veneer, MDF, and many previously painted pieces, with adjustments for each surface, as the Baltimore Chronicle editorial team notes.
The biggest decision is not the paint color. It is whether the surface needs primer before chalk paint. Glossy finishes, exposed wood, repairs, dark stains, and laminate usually benefit from priming. Skipping that stage can cause peeling, stains, or uneven color.
Key takeaways
- Clean before sanding because furniture polish, wax, grease, and silicone can prevent primer from bonding.
- Use primer when stains, glossy finishes, repairs, laminate, or exposed wood could affect adhesion and color.
- Apply several thin coats instead of 1 heavy coat, then protect high-use surfaces with a compatible clear finish.
Chalk paint can reduce preparation on suitable furniture, but “minimal prep” does not mean ignoring the surface. Rust-Oleum recommends lightly scuffing high-gloss surfaces before applying Chalked Ultra Matte Paint. The manufacturer also allows up to 3 coats when additional coverage is needed.
That distinction matters on dressers because drawer fronts and top surfaces receive frequent contact. A finish that looks acceptable after 30 minutes may still be vulnerable to fingernails, lamps, trays, and hardware.
What you need before painting a dresser
A basic dresser project does not require professional spray equipment. Most homeowners can get a smooth finish using a quality brush and small roller. The preparation tools matter more than an expensive applicator.
- Screwdriver or drill for knobs, pulls, and removable hardware
- Degreasing cleaner and lint-free cloths
- 120-, 180-, and 220-grit sandpaper or sanding sponges
- Wood filler for dents, chips, or unwanted hardware holes
- Bonding or stain-blocking primer when required
- Chalk paint or furniture-compatible enamel
- 2-inch quality synthetic brush and 4-inch mini roller
- Drop cloth, painter’s tape, gloves, and eye protection
- Optional matte clear coat for additional wear resistance
For 2026 budgeting, a quart of common primer often costs about $16 to $33 at major US retailers. Home Depot has listed products such as Zinsser Bulls Eye 1-2-3 around the lower end of that range and B-I-N closer to the upper end. Prices vary by state, store, and promotion.
A complete DIY dresser project commonly lands around $45 to $120 when basic tools are already available. Premium paint, new hardware, extensive repairs, or buying a sander can push the cost higher.
| Item | Typical 2026 planning range | When it matters most |
|---|---|---|
| Primer, 1 qt | $16–$33 | Gloss, stains, raw wood, laminate |
| Furniture or chalk paint | $20–$45 | Main finish and color |
| Sandpaper and cleaning supplies | $10–$25 | Adhesion and surface quality |
| Brush or mini roller | $8–$20 | Smoother application |
| Optional protective finish | $15–$30 | Dresser tops and heavy-use pieces |
The cheapest product is not always the lowest-cost choice. Poor sandpaper clogs quickly and encourages excessive pressure. Low-quality brushes can also leave loose bristles inside the finish.
One quart is usually enough for an average dresser, depending on color and product coverage. Rust-Oleum lists practical coverage around 110 to 150 sq ft per quart for some Chalked formulas.
Readers dealing with damaged varnish rather than paint can use this guide to refinishing wood furniture. Refinishing and painting require different preparation once bare wood becomes the intended final surface.
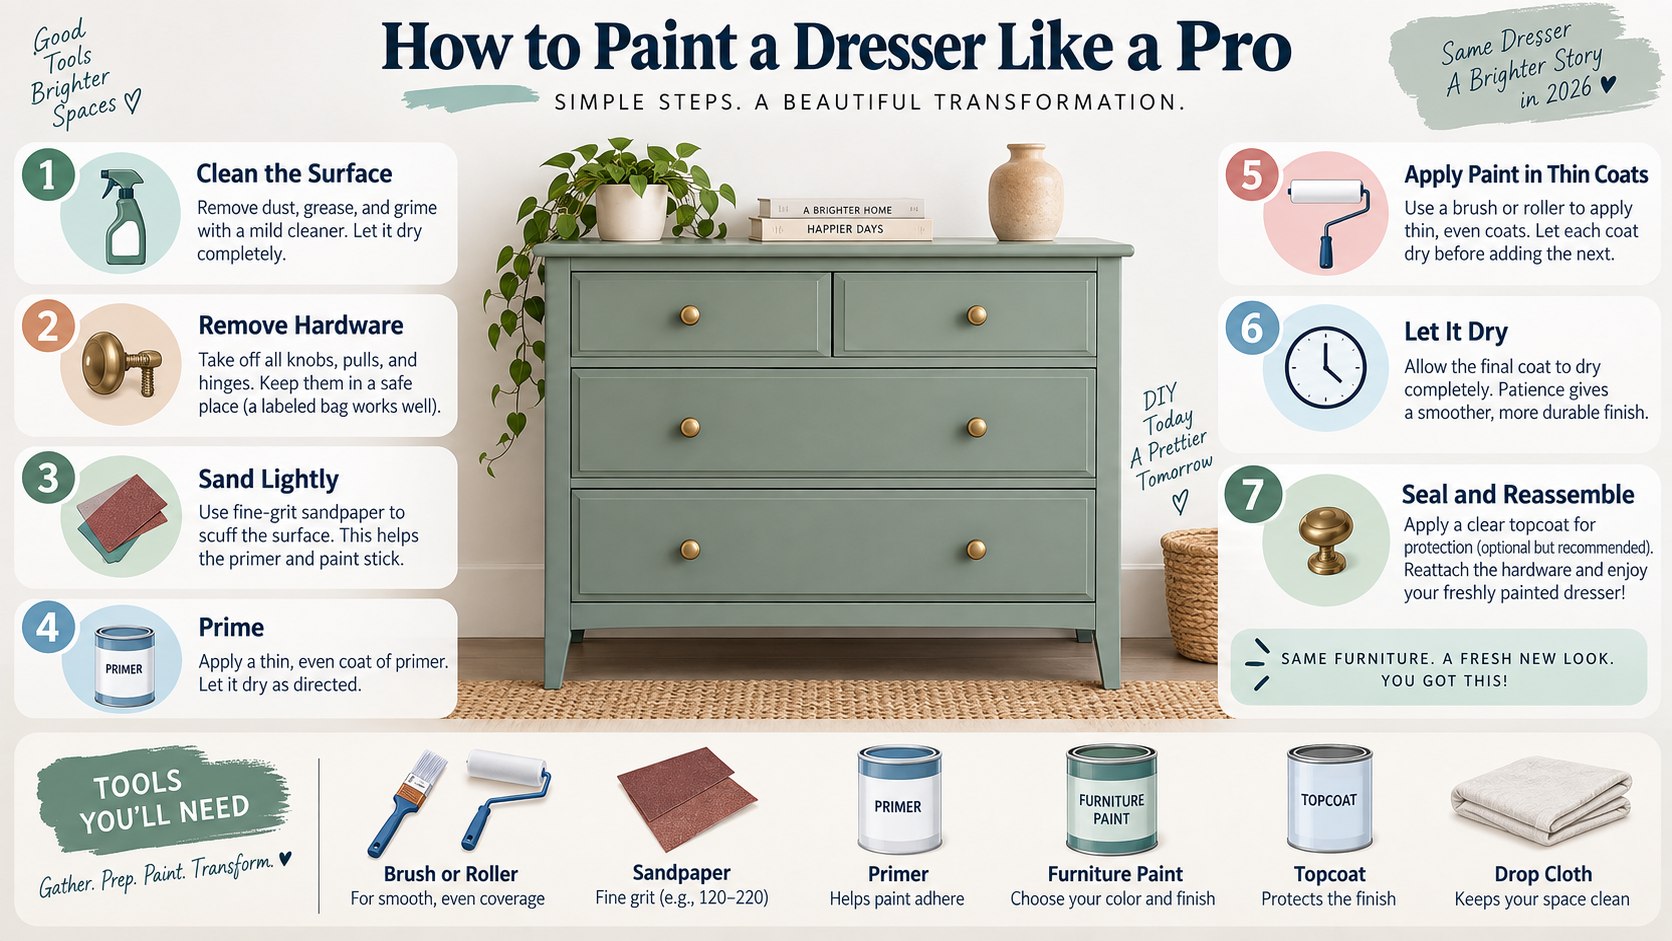
How to paint a dresser like a pro step by step
Step 1: Remove drawers and hardware
Pull out every drawer and remove knobs, pulls, escutcheons, and other removable hardware. Mark drawer positions with painter’s tape if the dresser has uneven handmade openings.
This prevents painted-over screws and creates cleaner edges around hardware holes. A common mistake is painting drawers inside the case, where fresh paint can bridge gaps and cause sticking.
Step 2: Clean before sanding
Wash painted and finished surfaces with a suitable degreasing cleaner. Pay extra attention around handles, drawer edges, and the top.
Cleaning first keeps wax and oily contamination from being driven into sanding scratches. Never treat sanding as a replacement for degreasing.
А dresser can look perfectly clean while still carrying invisible furniture polish that weakens paint adhesion.
If the piece was previously waxed, follow the paint manufacturer’s instructions for wax removal. Test the chosen system on an inconspicuous area before coating the entire dresser.
Step 3: Sand only as much as the surface requires
Use 180-grit abrasive for routine scuff sanding on a sound existing finish. Drop to 120 grit only when leveling damage or removing rough paint edges.
The goal is usually to dull the gloss rather than expose bare wood. Aggressive sanding can quickly damage thin veneer on drawer fronts and dresser tops.
“Minimize dust during the project.”
The US Environmental Protection Agency gives that advice for renovation involving possible lead paint. Furniture with unknown old coatings deserves similar caution. EPA says pre-1978 painted surfaces can create dangerous lead dust when disturbed. Its DIY lead-safety guidance recommends testing, containment, lower-dust methods, and HEPA cleanup.
Step 4: Repair damage and decide whether primer is necessary
Fill dents, chipped edges, and unwanted hardware holes before priming. Sand repairs flush after the filler has fully hardened.
Primer for furniture painting is especially useful over dark stains, bare wood, MDF repairs, laminate, and glossy factory finishes. Shellac-based stain blockers can also help when tannins or old discoloration bleed through water-based coatings.
- Use a bonding primer when adhesion is the main concern.
- Choose a stain-blocking primer for tannins, water marks, or persistent discoloration.
- Prime repaired spots when filler absorbs paint differently from the surrounding finish.
- Follow product instructions for laminate because not every coating bonds equally well.
Apply primer thinly instead of trying to create an opaque white shell immediately. Thick primer can build ridges around drawer edges and decorative profiles. Let it dry for the specified interval before sanding or recoating.
A 220-grit sanding sponge can flatten small nibs after the primer dries. Remove all sanding residue before paint. Vacuum first, then wipe with a clean lint-free cloth suitable for the coating system.
The same preparation logic applies to cabinetry. A related Baltimore Chronicle guide on painting kitchen cabinets professionally can support readers working on larger furniture and interior projects.
Step 5: Apply chalk paint in thin coats
Stir the paint thoroughly without whipping air into it. Brush detailed corners first, then coat large flat areas with long, controlled strokes.
Chalk paint for a dresser is forgiving because the matte surface hides small application imperfections. It still performs better when each coat stays even.
“Lightly scuff high-gloss surfaces with sandpaper or a sanding sponge before applying Chalked Paint.”
That instruction comes from Rust-Oleum’s Chalked product guidance. The company says its brush-on coating can receive 1 to 3 coats. Recoat timing depends on the exact formulation.
Other brands can require different waiting periods. Use the label on the exact product instead of applying another manufacturer’s schedule.
Step 6: Sand between coats when the finish needs it
Not every chalk-painted dresser needs sanding between every coat. Light sanding helps when dust nibs, brush ridges, or rough fibers remain visible.
Use 220-grit or finer abrasive with very little pressure. Sanding through corners is a common mistake, particularly when painting contrasting dark furniture with light colors.
Professional-looking furniture usually comes from surface control between coats, not from applying more paint.
Step 7: Protect the finished dresser
Allow the paint to dry according to its manufacturer before adding any protective finish. Use only a topcoat confirmed as compatible with the paint below.
Sealing chalk paint is useful on dresser tops and children’s furniture because these surfaces receive repeated contact. Matte protective coatings can add durability while keeping the low-sheen appearance.
Apply protective coating with light strokes rather than repeatedly brushing areas that have started drying. Follow the specific manufacturer’s tool and drying recommendations.
Do not immediately load the dresser with lamps, trays, or storage baskets. Dry-to-touch time and full cure time are different. Fresh coatings can dent long after they stop feeling wet.
Step 8: Reinstall hardware without damaging fresh paint
Wait until the coating has developed enough hardness for careful assembly. Reinstall clean hardware and tighten screws gradually.
Painting dresser drawers requires extra restraint around side edges. Heavy paint buildup there can reduce clearance and make drawers bind.
Replace knobs only after checking their screw length against repaired or newly drilled holes. Hardware with wider backplates can conceal old holes without additional filling.
Primer or no primer with chalk paint?
The claim that chalk paint never needs primer is too broad. Some products are specifically designed for strong adhesion with limited preparation. The actual dresser surface still controls the decision.
| Dresser surface | Primer? | Reason |
|---|---|---|
| Clean, matte, previously painted wood | Often optional | Existing coating may provide adequate grip |
| High-gloss varnish | Recommended | Improves adhesion after scuff sanding |
| Bare pine or oak | Usually helpful | Controls absorption and possible tannin bleed |
| Laminate | Recommended | Slick surfaces need stronger bonding |
| MDF with exposed repairs | Recommended | Seals porous areas and evens absorption |
| Unknown stained antique | Often recommended | Reduces stain migration through light paint |
A test patch can save hours. Apply the intended primer and paint to a hidden area, then let it dry fully. Try scratching the coating gently with a fingernail.
If the entire film peels away easily, investigate contamination or incompatible products. Adding another coat rarely fixes an adhesion failure underneath.
White and pale gray finishes reveal bleed-through more readily than dark colors. Mahogany, cedar, knotty pine, and previously stained pieces may require stronger stain blocking. Spot-prime persistent areas before repainting the entire dresser.
Painting wood furniture successfully means matching preparation to the existing finish rather than following 1 universal recipe.
Troubleshooting common dresser painting problems
Most visible failures can be traced to contamination, excessive coating thickness, rushed drying, or the wrong primer. Correct the underlying cause before adding more paint.
- Paint scratches off easily: stop and check cleaning, sanding, primer compatibility, and cure time.
- Brown or yellow marks return: allow the surface to dry, then use a suitable stain-blocking primer.
- Brush marks stay visible: apply thinner coats and avoid brushing paint after it begins setting.
- Drawers stick: remove excess coating from contact edges and allow more curing time.
- Top feels tacky: reduce handling and verify whether incompatible wax or polish remained underneath.
Do not treat every rough surface with aggressive power sanding. Fine abrasive can remove dust nibs without cutting through the finish. Working harder is often less effective than changing grit.
Temperature and humidity also affect drying. Many furniture coatings work best in moderate temperatures and controlled humidity. Check the product label for the acceptable application range before starting.
Cold garages can extend drying considerably. Hot surfaces can make paint set before it levels. Moderate indoor conditions usually make brushwork easier to control.
If wrinkles appear after recoating, stop rather than adding another layer. Let the coating harden, sand the damaged area smooth, then follow the manufacturer’s recoat window.
FAQ
Do you have to sand a dresser before painting it?
Not every dresser needs full sanding. Glossy finishes usually need scuff sanding, while damaged coatings require more preparation. The purpose is adhesion and leveling, not automatic removal of every old finish.
Should you use primer before chalk paint?
Primer is not always required, but it solves several common problems. Use it for stains, laminate, exposed MDF, glossy surfaces, bare wood, and difficult color changes.
How many coats of chalk paint should a dresser get?
Coverage depends on color, surface, and product. Many chalk paints need 1 to 3 coats. Follow the instructions for the exact brand being used.
How long should a painted dresser dry before use?
Follow the manufacturer’s cure guidance rather than relying only on touch dryness. A surface can feel dry while remaining soft underneath. Delay heavy objects and aggressive cleaning until the coating develops adequate hardness.
Can you paint laminate dresser furniture?
Yes, when the laminate remains firmly attached. Clean it thoroughly, scuff the surface carefully, and use a primer approved for slick surfaces. Test adhesion before coating the entire piece.
Is chalk paint durable enough for a dresser?
Chalk paint can work well on bedroom furniture. High-contact dresser tops benefit from a compatible protective finish. Proper cleaning and preparation remain more important than the decorative paint category alone.
Earlier we wrote about How Section 8 Landlords Get Paid in 2026: HAP Contract, Inspection and PHA Approval Rules