

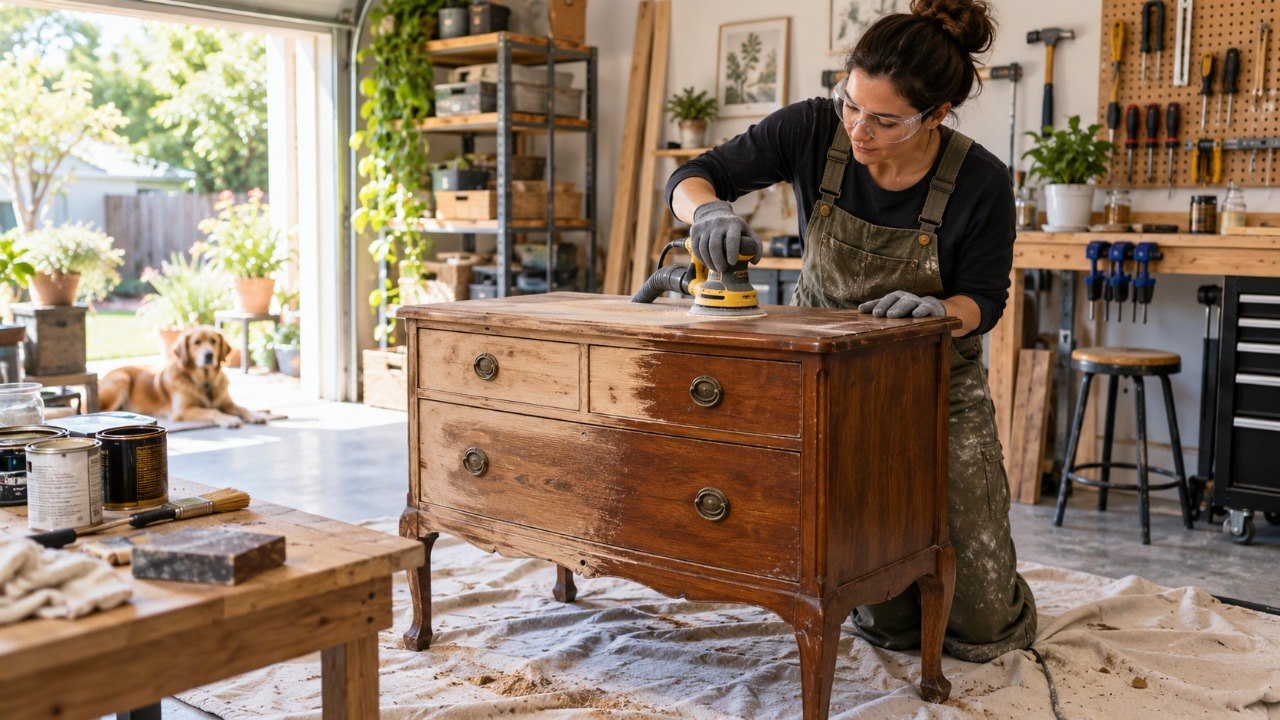
How to refinish wood furniture at home comes down to 3 jobs: remove the old finish, sand evenly, and apply stain correctly. A dresser or side table usually needs a weekend, although drying can extend the project. Most beginners can do the work with basic tools and about $60–$150 in supplies, depending on the finish and furniture size, as noted by the Baltimore Chronicle editorial team.
The decisive work happens before the stain can is opened. Leaving patches of varnish creates uneven color, while aggressive sanding can erase veneer within minutes. Old painted furniture also requires extra caution because sanding may release hazardous dust.
Key takeaways
- Strip thick varnish or paint first instead of trying to remove every finish with sandpaper.
- Sand with progressively finer grits and stop before the wood becomes polished or damaged.
- Test stain underneath the furniture because species, age, and previous finishes change the final color.
Solid wood is the easiest candidate for refinishing because scratches and discoloration usually remain near the surface. Veneered furniture can also be restored, but the sanding margin is much smaller. Particleboard covered with printed laminate cannot be refinished like natural wood.
Before buying supplies, inspect edges, drawer fronts, and the underside. Repeating grain patterns may reveal veneer or artificial surfaces. Real wood usually shows grain continuing around an edge.
Furniture value matters as well. A century-old table with its original finish may lose collectible value after refinishing. Ordinary household furniture presents fewer concerns.
The process also makes more economic sense on solid pieces with stable joints. A badly swollen particleboard cabinet rarely becomes a better investment after hours of surface work.
For households deciding between restoration and replacement, the Baltimore Chronicle’s 2026 guide to furniture retailers in the USA offers useful price context.
What you need before starting
A basic refinishing setup does not require professional machinery. It does require compatible chemicals, good abrasives, ventilation, and enough uninterrupted drying time.
- Chemical stripper for painted or heavily varnished surfaces
- Plastic or metal scraper approved for the chosen stripper
- 80-, 120-, 150-, and 180-grit sandpaper
- Random-orbit sander for broad solid-wood surfaces, if appropriate
- Vacuum, tack cloth, or lint-free cleaning cloths
- Wood stain and optional pre-stain conditioner
- Clear polyurethane, polycrylic, lacquer, or another compatible topcoat
- Chemical-resistant gloves, eye protection, and appropriate respiratory protection
- Drop cloths or heavy plastic sheeting
- About 1–3 days, including drying periods
Expect a typical 2026 DIY supply bill near $60–$150 for a small or medium piece. A quart of common interior stain often sells around $10–$20. Chemical stripper can add roughly $20–$55, depending on container size and formula. Sandpaper, brushes, gloves, and topcoat account for much of the remaining cost. Larger furniture or projects needing specialty finishes can exceed $200.
The lowest-cost approach is not always the cheapest overall. Old sandpaper cuts unevenly and encourages excessive pressure. Cheap brushes can shed fibers into the finish.
California shoppers may see different stripper formulations because product availability and chemical rules vary by jurisdiction. Always follow the label sold in the state where the work occurs.
Buying enough stain from one product line reduces the chance of discovering a color mismatch halfway across a tabletop.
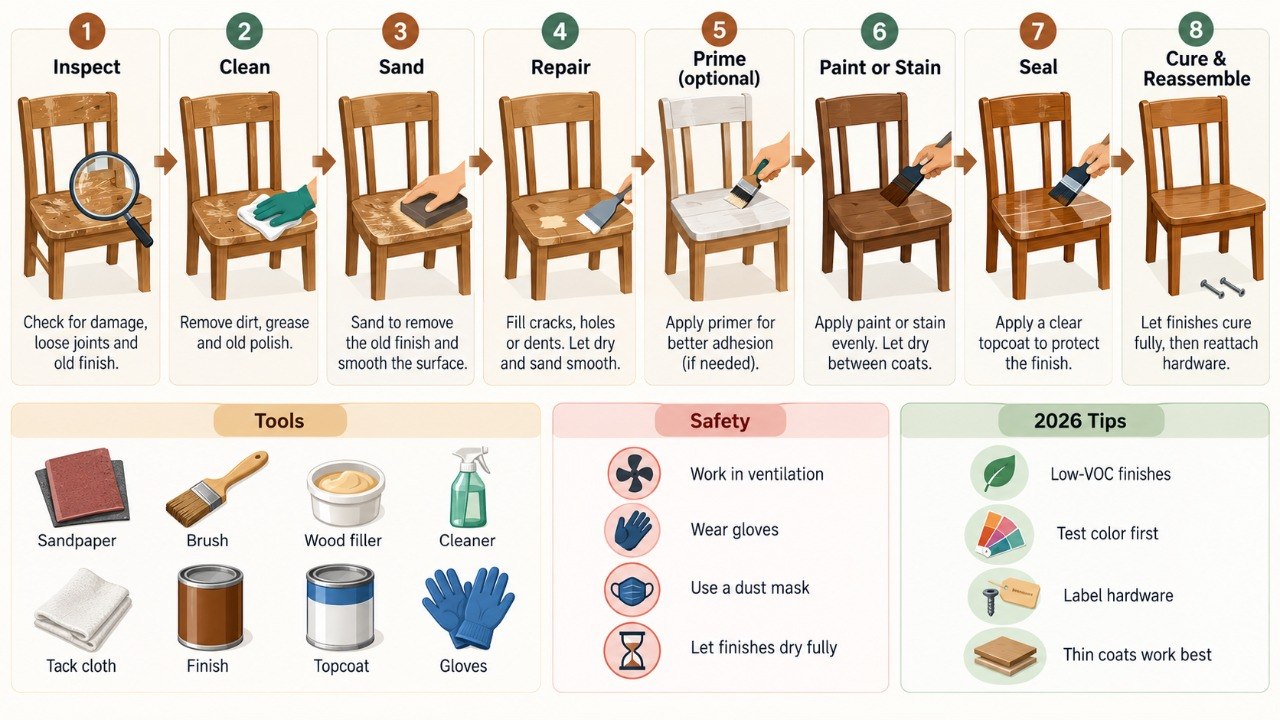
Step 1: How to refinish wood furniture at home safely
Move the furniture to a ventilated garage, covered outdoor area, or dedicated workspace. Remove drawers, knobs, hinges, and other hardware before touching the finish. Photograph complicated hardware positions first.
Safety becomes more important when paint is present. The EPA says sanding and scraping painted surfaces can create paint dust, particularly in work involving older coatings. Its DIY lead-dust guidance recommends containing dust and keeping children and pets outside the work zone.
“Minimize dust during the project.”
U.S. Environmental Protection Agency, lead-safety guidance for homeowners undertaking DIY renovation work.
Preparation controls both exposure and cleanup. Dust can travel through open doors and HVAC vents.
The common mistake is power-sanding unknown old paint immediately. EPA guidance favors lower-dust methods and HEPA-equipped tools when painted surfaces may create hazardous dust.
Step 2: Strip paint, varnish, or polyurethane
Apply stripper according to its label and work in manageable sections. Let the chemical soften the coating before scraping gently in the grain direction.
Do not force a scraper underneath resistant finish. Gouges created now can remain visible after staining. Rounded furniture edges are especially vulnerable.
Several stripping approaches suit different jobs. The choice depends more on the existing coating than furniture size.
| Method | Best use | Main advantage | Main risk |
|---|---|---|---|
| Chemical stripper | Paint or thick varnish | Removes multiple layers efficiently | Fumes, skin exposure, residue |
| Hand sanding | Thin clear finish | High control | Slow on large surfaces |
| Power sanding | Flat solid wood | Fast material removal | Veneer damage and swirl marks |
| Scraping | Softened finish | Little abrasive dust | Gouging from excessive pressure |
Stripping should expose wood rather than reshape it. Residue left in corners can prevent stain from penetrating evenly. Follow the stripper manufacturer’s cleanup directions because products use different chemistries.
Allow cleaned wood to dry fully before sanding. Moist solvent or water trapped in pores changes how abrasives cut. It may also affect stain absorption.
Decorative grooves require patience rather than heavier scraping. Nylon abrasive pads or suitable detail tools offer more control around molding.
For veneered pieces, chemical removal often preserves more material than aggressive sanding. The veneer itself may be only a thin decorative layer.
The same repair-versus-replace calculation appears with mass-market furniture. The Baltimore Chronicle’s guide to how long IKEA furniture lasts explains why construction materials matter when deciding whether restoration is worthwhile.
Step 3: Sand the wood without destroying the surface
Sand wood furniture before staining with a grit sequence matched to its condition. On rough solid wood, 80 or 100 grit may be appropriate. Furniture already stripped clean may only need 120 or 150 grit.
- Level remaining finish or damage with the coarsest necessary grit.
- Move to 120 or 150 grit to remove scratches from the previous abrasive.
- Finish most stain-ready furniture around 180 grit unless the product specifies otherwise.
- Hand-sand edges, profiles, and veneer with light pressure.
- Vacuum thoroughly before inspecting the grain under angled light.
Each grit should remove scratches left by the one before it. Jumping directly from coarse paper to very fine paper can leave marks beneath the stain. Those scratches often appear darker after color is applied.
Sanding too finely creates another problem. The surface can become less receptive to penetrating stain. Follow the stain maker’s preparation instructions instead of chasing a glass-smooth feel.
A random-orbit sander should remain flat while moving. Tilting the tool concentrates pressure on a small area and creates depressions.
Veneer deserves hand sanding whenever its thickness is uncertain. Stop immediately if the color or grain pattern changes unexpectedly.
Good sanding is almost invisible after finishing; bad sanding becomes clearer with every coat that follows.
Step 4: Test and apply the wood stain
Test wood stain for furniture on the underside, behind a drawer, or on matching scrap wood. A store sample cannot predict exactly how aged oak, pine, maple, or walnut will absorb pigment.
Softwoods such as pine can become blotchy. Minwax advises using a suitable pre-stain conditioner when uneven absorption is likely. Its current product guidance also notes that final color varies with wood species and pore structure.
“Stain is designed to be applied to bare wood.”
Minwax, wood-finishing guidance on stain absorption and unfinished surfaces.
Apply stain with a cloth, brush, or applicator permitted by the product instructions. Work with the grain and maintain a wet edge. Wipe away excess rather than leaving a heavy film.
Penetrating stain colors wood by entering its pores. Remaining clear finish blocks absorption and creates pale patches. The common mistake is applying more stain over a sealed area instead of correcting surface preparation.
Some oil-based stains may require several hours before recoating or topcoating. Water-based versions can dry faster, but humidity and cold can extend those periods. Always follow the actual product label.
Step 5: Seal the refinished furniture
A stain changes color but does not provide the same protection as a clear topcoat. Choose polyurethane for wood furniture or another compatible finish based on wear, appearance, and cleanup preferences.
Dining tables and desks usually need more abrasion resistance than decorative cabinets. Water-based clear finishes often preserve a lighter appearance. Oil-based polyurethane typically adds warmer amber tones.
Apply thin coats instead of one heavy layer. Thick applications, poor ventilation, cold temperatures, and humid weather can lengthen drying times.
A fully cured protective layer takes the daily abuse that stained wood should not. Follow manufacturer directions for sanding between coats. Different finish systems have different requirements.
The common mistake is reinstalling hardware or placing objects on the furniture too soon. “Dry to touch” does not necessarily mean ready for normal use.
Step 6: Reassemble and inspect the finished piece
Reattach hardware only after the final finish reaches the manufacturer’s recommended handling stage. Tighten screws securely, but avoid crushing softened finish beneath escutcheons and handles.
Inspect the surface from several angles under daylight. Small dull areas may signal uneven coating, while rough particles usually indicate dust trapped during application.
Do not immediately polish a new clear coat. Many protective finishes continue curing after they feel dry. Cleaning products can interfere with a finish that has not reached full cure.
The final 24–72 hours can determine whether careful surface work remains intact. The common mistake is putting a lamp, television, or decorative tray back too early.
Once cured, refinished wood furniture should be cleaned with methods suitable for the chosen topcoat. Avoid standing water and abrasive pads unless the coating manufacturer specifically allows them.
Troubleshooting common refinishing problems
Most refinishing failures appear during sanding, staining, or the first clear coat. Correcting them early is easier than adding another layer over the defect.
- Stain looks blotchy: let it dry, assess the wood species, and consider conditioner before another attempt.
- Stain stays tacky: excess stain may remain on the surface, or drying conditions may be poor.
- Swirl marks appear: sand them out progressively before applying additional stain.
- Finish turns cloudy: moisture or humidity may have affected the clear coat.
- Color differs between drawers: parts may use different wood species or veneer batches.
Do not solve tackiness by immediately applying polyurethane over it. The underlying stain must reach the condition specified by its manufacturer.
Cloudiness requires identifying the finish before choosing a repair. Adding random solvents can make a reversible problem permanent. Temperature and humidity should also be checked.
Visible sanding marks require returning to abrasion rather than hiding them with more pigment. Dark stains usually emphasize scratches instead of concealing them.
Color differences across components may be natural. Factory furniture can combine solid wood, veneer, and secondary woods within one piece.
A small test area remains the safest correction method. It shows whether a repair improves the defect before the entire surface is changed.
FAQ about refinishing wood furniture at home
Can furniture be refinished without stripping it?
Yes, if the old clear finish is thin, stable, and suitable for sanding away. Thick paint, lacquer, or multiple varnish layers usually make stripping more practical.
What grit sandpaper should be used before staining?
Many projects finish around 150–180 grit, but the correct range depends on wood and stain instructions. Start only as coarse as necessary to remove damage.
Can veneer furniture be refinished?
Yes, but sanding must be conservative because veneer is thin. Hand sanding gives greater control near edges, corners, and already worn areas.
How long does furniture refinishing take?
A simple table can take 1 weekend. Complex stripping, repairs, humidity, and multi-coat finishes may extend the project to several days.
How much does it cost to refinish furniture yourself in 2026?
A practical DIY budget is roughly $60–$150 for many small or medium projects. Large pieces, premium finishes, or new power tools can push costs beyond $200.
Should old painted furniture be sanded indoors?
It is a poor default choice, particularly when the coating history is unknown. EPA guidance recommends containing dust and using safer dust-control practices around painted surfaces.
Earlier we wrote about AC Running but Not Cooling: Common HVAC Causes, DIY Checks and 2026 Repair Costs