

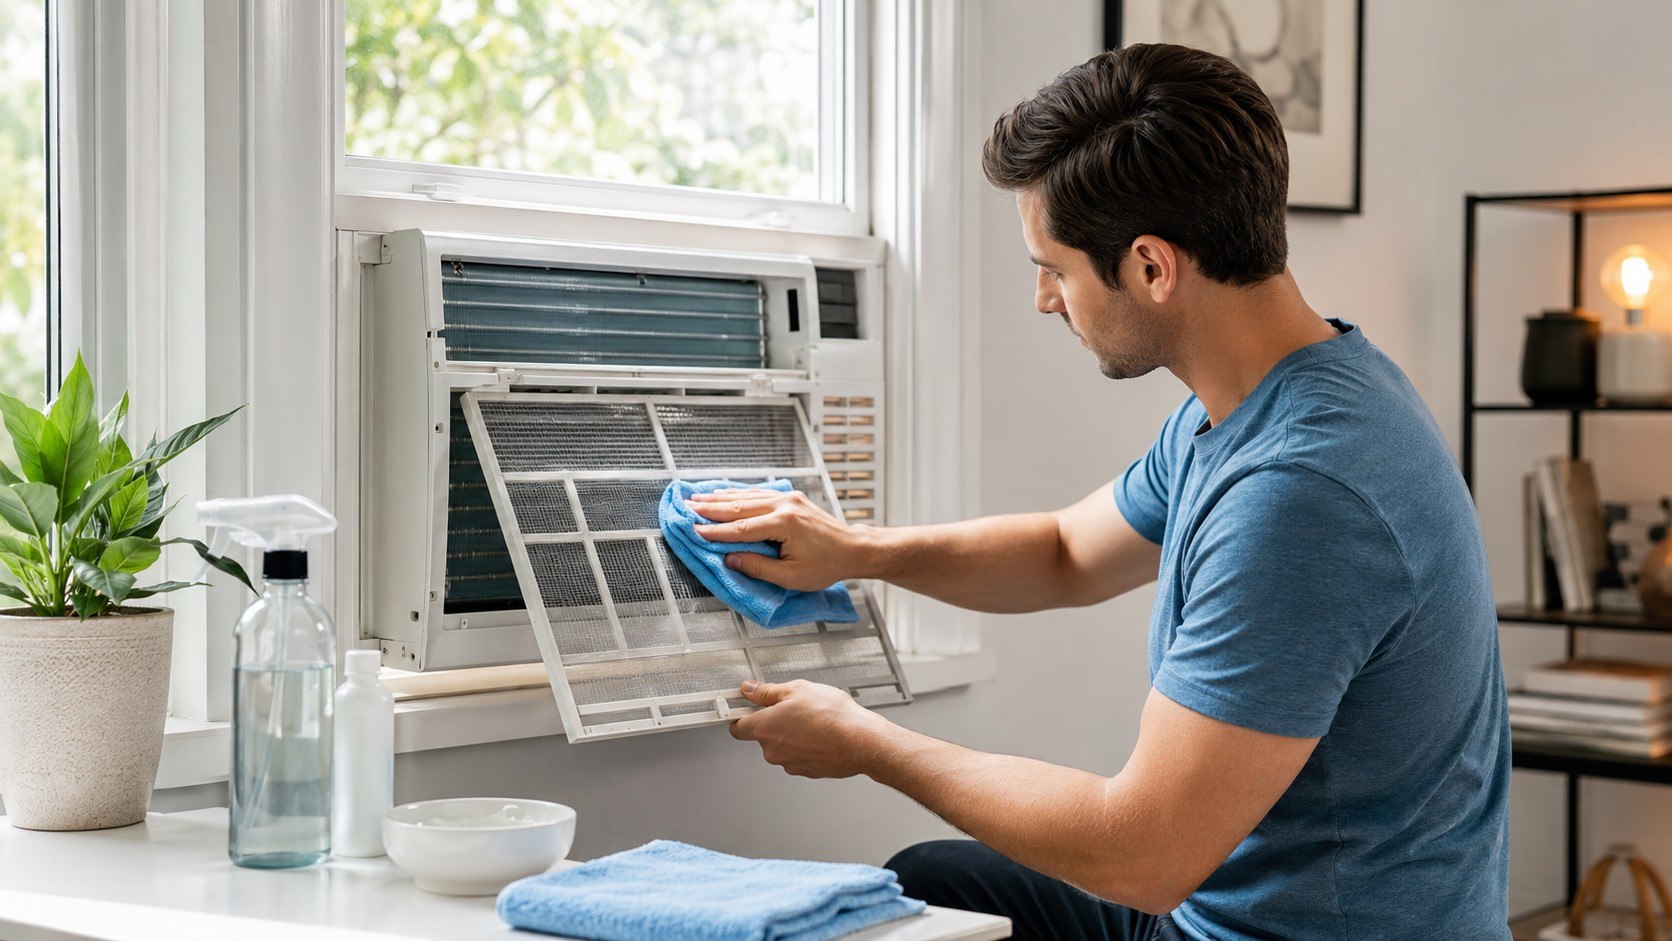
How to clean a window AC unit safely starts with cutting power, removing the washable filter, clearing dust from the coils, and eliminating trapped moisture. A routine cleaning usually takes 45–90 minutes, plus drying time, and requires only basic household tools, as noted by the Baltimore Chronicle editorial team.
The biggest mistake is treating a window air conditioner like a washable plastic appliance. Water must stay away from controls, wiring, capacitors, and motors. The filter can usually be washed, while coils need gentler treatment. Visible mold requires attention to both contamination and the moisture source.
Key takeaways
- Disconnect the AC from power before removing covers, brushing coils, washing filters, or reaching inside the cabinet.
- Clean washable filters regularly, because clogged material restricts airflow and can contribute to weak cooling or coil icing.
- Mold that repeatedly returns usually signals trapped moisture, blocked drainage, high humidity, or contamination deeper inside the appliance.
Cleaning can restore airflow when dust is the problem. It cannot repair a failed compressor, refrigerant leak, damaged fan motor, or burned electrical component. Owners dealing with an outdoor central-air unit should use a different procedure; this guide to cleaning an AC condenser covers that equipment. Electricity costs also matter when an older unit runs excessively, and this 2026 electric-bill guide explains how to separate usage from utility rates. Renters should also check lease rules before removing a landlord-owned unit from a window.
What you need
Most window air conditioner cleaning jobs do not require specialty equipment. Check the owner’s manual before opening panels beyond the normal user-maintenance areas.
- Vacuum with a soft brush attachment
- Microfiber cloths
- Soft nylon brush or old toothbrush
- Mild dish detergent
- Warm water
- Spray bottle
- Screwdriver that matches the cabinet screws
- Work gloves
- Fin comb, only if fins need minor straightening
- 45–90 minutes, plus complete drying time
A basic cleaning can cost almost nothing if these supplies are already available. In 2026, replacement filters vary widely by model and construction. GE-listed room AC filter parts, for example, include options from roughly $10 to $40, with some specialty assemblies costing more. Always search by the exact model number before ordering. Universal material should not replace a model-specific filter unless the manufacturer permits it.
“The air filter in your Room Air Conditioner should be cleaned every 30 days.”
GE Appliances, room air-conditioner filter maintenance guidance. The manufacturer also says a washed filter should dry completely before reinstallation.
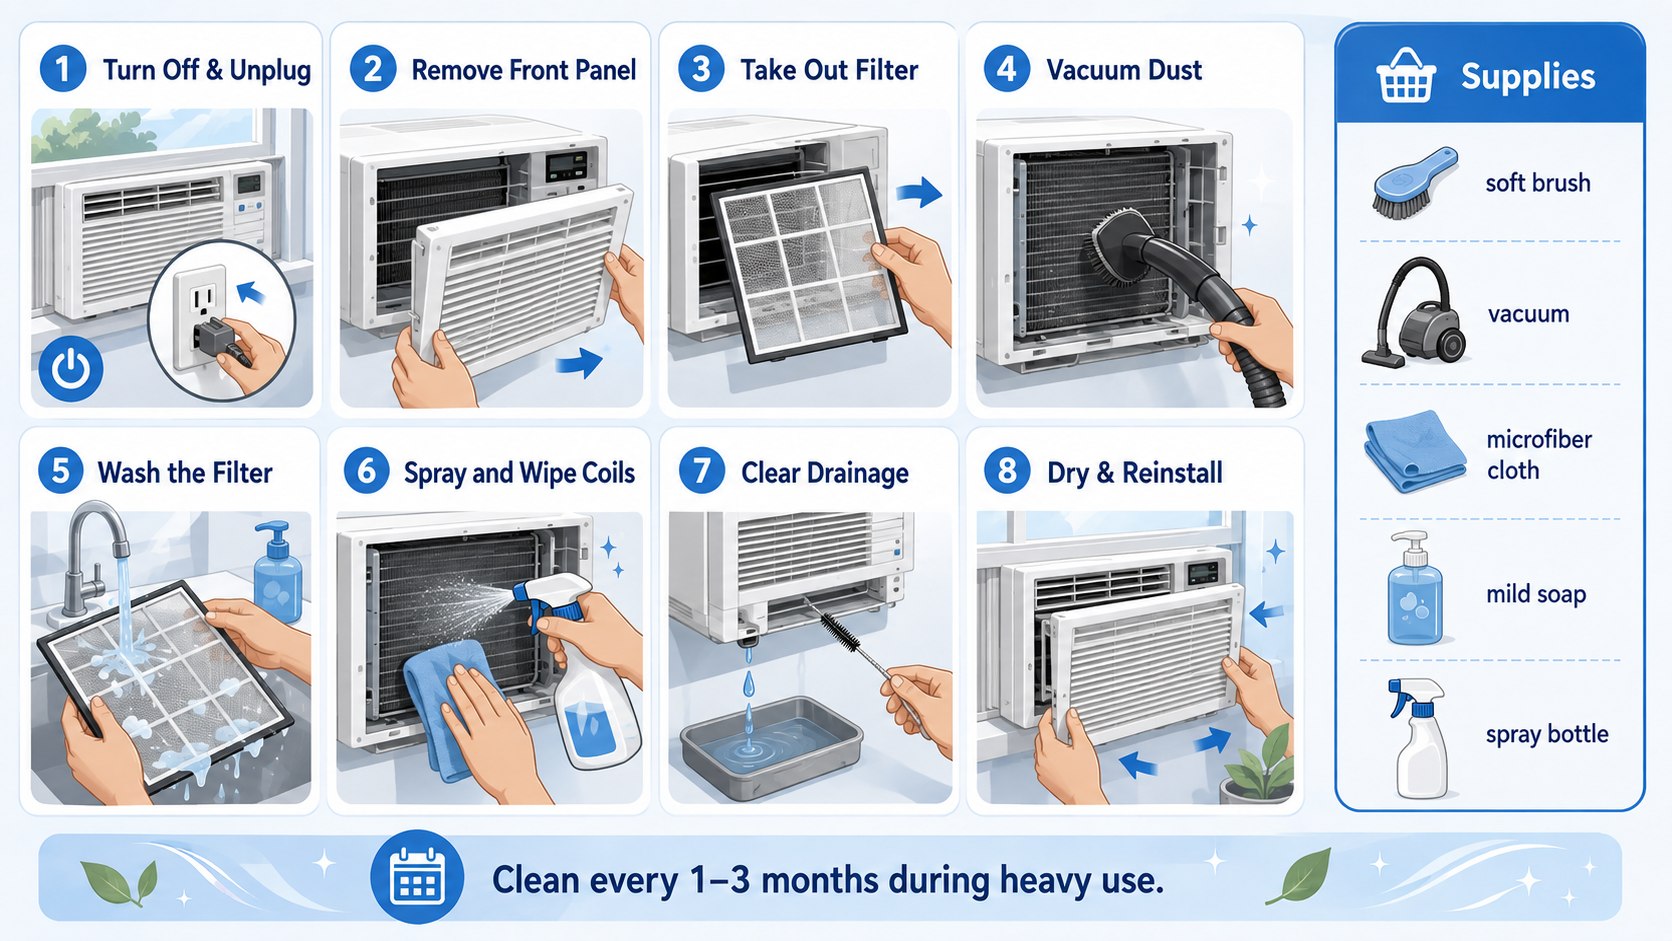
Step 1: Shut off power and inspect the unit
Turn the air conditioner off and unplug it from the wall outlet. If the plug or receptacle shows scorching, melting, looseness, or heat damage, stop before cleaning, via westminsterpimliconews.co.uk.
This step matters because the cabinet contains electrical components that are not safe to handle while energized. Do not assume pressing the power button provides the same protection as physically disconnecting the plug.
The common mistake is spraying cleaner through the vents while the unit remains plugged in. That can move liquid toward controls and wiring.
Never spray water blindly through the front grille of an installed window unit.
Before opening anything, identify the model number. Manufacturers including GE, Frigidaire, LG, Midea, Friedrich, and Whirlpool may use different panel clips, filter layouts, drainage designs, and coil access points. The owner’s manual overrides generic cleaning advice.
Step 2: Remove and clean the filter
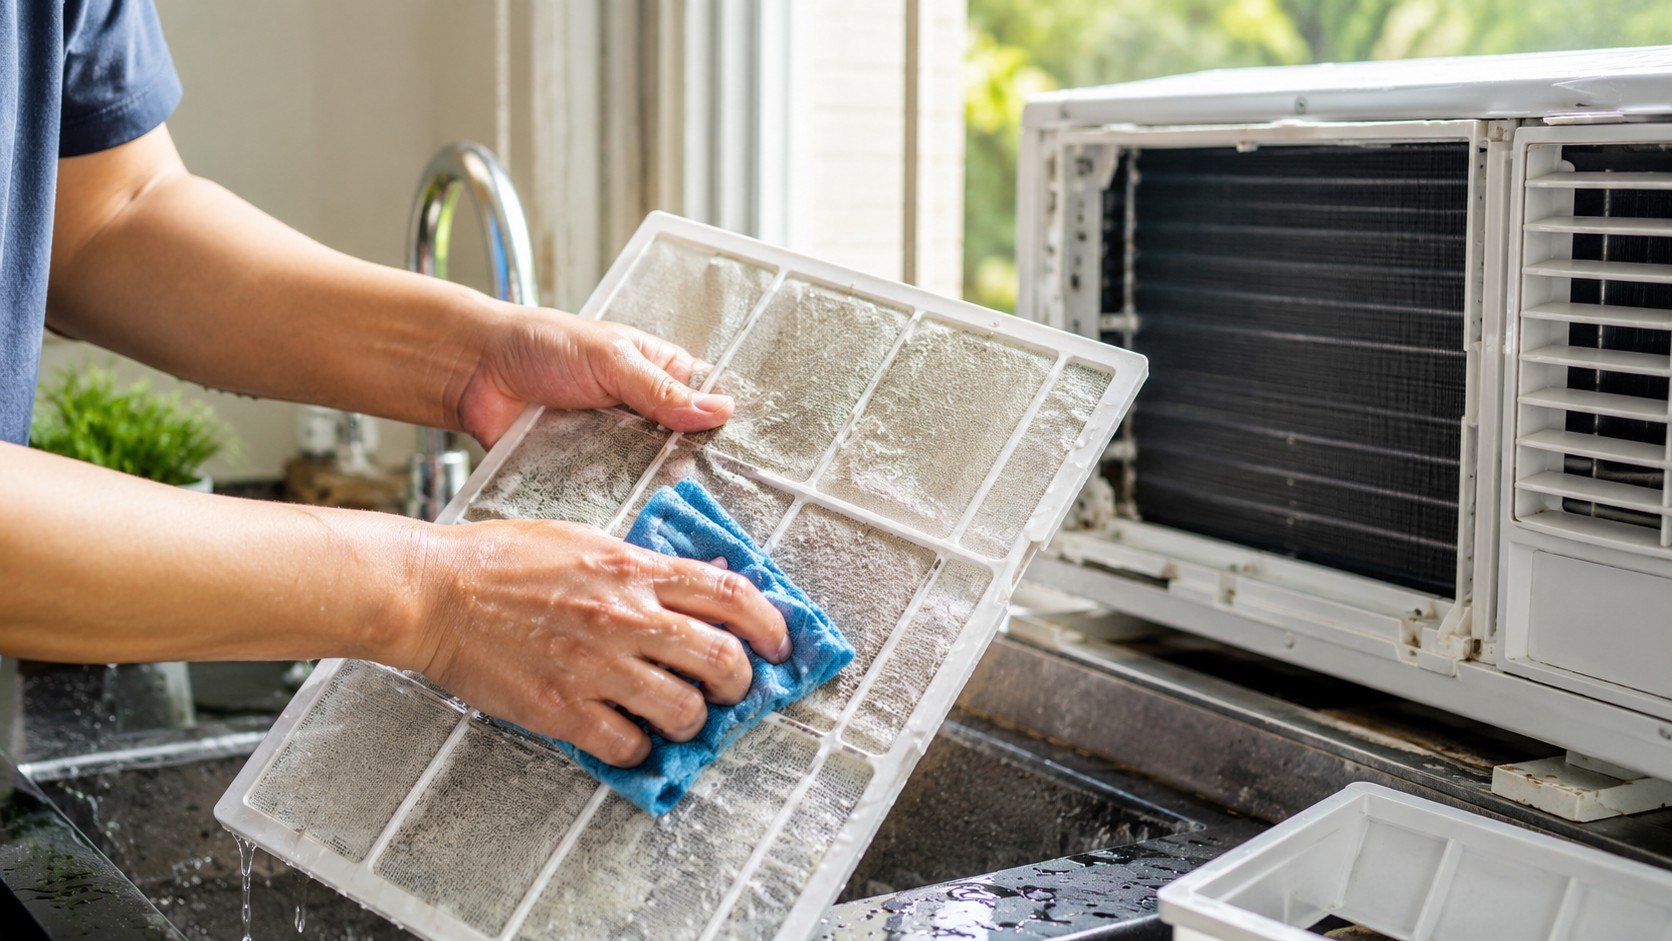
Open the front grille according to the manual and carefully remove the reusable filter. Vacuum loose dust first, then wash the filter with warm water and a small amount of mild detergent if the manufacturer allows it.
The filter is the first defense against lint, hair, pet dander, and household dust reaching the evaporator coil. Restricted airflow forces the AC to move less air across that cold surface.
The mistake to avoid is reinstalling a damp filter. GE specifically advises allowing the filter to dry completely and warns against operating compatible room units without it.
A household with pets, open windows, nearby construction, or heavy summer use may need more frequent checks. GE recommends checking many room AC filters at least every 30 days. A filter that visibly loads with dust sooner should be cleaned sooner.
For owners comparing maintenance across household appliances, Baltimore Chronicle also covers refrigerator cooling problems and dirty coils.
Step 3: Clean the evaporator coil without crushing the fins
The evaporator sits behind the filter on the room-facing side. Use a vacuum with a soft brush or a gentle hand brush to lift dry debris in the direction of the fins.
Learning how to clean AC coils requires restraint. Aluminum fins bend easily, and crushed fins reduce the open area available for airflow.
Do not scrub across the fins with a stiff brush. Do not push a vacuum nozzle hard against them. If a few fins are bent, a correctly sized fin comb can straighten minor damage without forcing the metal.
The condition of the coil helps identify what happens next.
| What you see | Likely issue | Appropriate response |
|---|---|---|
| Light gray dust | Normal household buildup | Vacuum or brush gently |
| Matted lint | Poor filter maintenance | Clean filter and coil surface |
| Ice on coil | Airflow or mechanical problem | Thaw fully and investigate |
| Dark spotting with odor | Possible microbial growth | Clean accessible surfaces and find moisture |
| Oily residue | Possible refrigerant-system issue | Stop and request service |
Ice should never be chipped away with a screwdriver or knife. Allow the unit to thaw with power disconnected. Persistent icing after filter and airflow problems are corrected can indicate a fan, thermostat, or refrigerant problem. Oily residue deserves professional attention because household cleaning does not repair a sealed refrigeration circuit. A damaged coil can turn an inexpensive maintenance job into appliance replacement.
Step 4: Clean the condenser side and drainage areas
The outdoor-facing condenser coil releases heat collected from the room. Remove loose leaves, insects, cottonwood fluff, lint, and dirt without bending the metal fins.
This part of cleaning window AC coils matters because blocked outdoor airflow reduces heat transfer. GE advises inspecting exterior coils regularly and says heavily clogged coils may require professional cleaning.
Avoid pressure washers. Their concentrated stream can flatten fins and drive water into places the manufacturer never intended to soak.
Then inspect the base pan and accessible drainage channels. Remove debris only where the manual allows access. Window units commonly use condensate in their normal operating design, so drilling a new drain hole is not a universal solution.
Water inside a window AC is not automatically a defect; standing water caused by blocked drainage is a different problem.
Correct installation angle also matters. Some models require a specific outward orientation while others use manufacturer-designed brackets or chassis geometry. Do not improvise the tilt without checking the installation manual.
Step 5: Deal with odor and possible mold
If the unit smells musty, inspect the filter, louvers, accessible plastic surfaces, drain area, and visible coil surfaces. How to clean mold from a window AC depends on how extensive the growth is and where it appears.
For accessible hard surfaces, the US Environmental Protection Agency recommends cleaning mold with detergent and water, then drying the surface completely. EPA also emphasizes controlling the moisture source rather than relying only on a cleaning chemical. EPA residential mold guidance says larger or complicated contamination may require professional help.
“The key to mold control is moisture control.”
U.S. Environmental Protection Agency, residential mold cleanup guidance, updated in 2026.
Do not mix bleach with ammonia, vinegar, or other cleaners. More chemical strength does not automatically make an AC safer. Some manufacturers prohibit bleach or aggressive solvents on specific components.
A recurring odor after cleaning deserves more attention. EPA recommends keeping indoor relative humidity below 60%, ideally around 30%–50% when practical. The agency also advises keeping air-conditioning drip pans clean and drain lines unobstructed.
Step 6: Clean the grille, louvers, and cabinet
Wipe the front grille and directional louvers with a damp microfiber cloth. A soft toothbrush can reach narrow corners where dust forms a dark line around vent openings.
This step prevents freshly cleaned internal surfaces from immediately collecting dirt from the front cover. It also removes residue that can create odor when the unit begins moving humid air.
Avoid saturating display panels, remote-control sensors, switches, or electronic controls. GE recommends water and mild detergent for compatible room AC grilles and cases rather than aggressive cleaners.
Once the grille is clean, wipe the exterior cabinet. Inspect the window seals and side curtains while access is easy. Gaps around the chassis allow humid outdoor air and hot air into the room.
Step 7: Dry, reassemble, and test cooling
Allow every washed component to dry fully before reinstalling it. Fit the filter in its original orientation, secure the grille, and replace only screws removed during normal maintenance.
Drying is essential because window AC mold removal fails when moisture immediately remains trapped around dirty surfaces. A wet filter can also restrict airflow.
The mistake is rushing directly from washing to operation. Give washed parts enough time to air-dry rather than using high heat that could deform plastic filter material.
After reassembly, reconnect power and start the AC. Listen for new rattling or scraping. Confirm that air movement feels normal and that water is not entering the room.
A clean machine that still cannot cool deserves diagnosis rather than another round of scrubbing.
Troubleshooting after cleaning
Some symptoms point beyond ordinary window AC maintenance. These situations help separate a cleaning problem from a repair problem.
- AC still smells musty: inspect drainage, hidden damp areas, and contamination behind user-accessible surfaces.
- Evaporator freezes again: verify the filter and airflow, then consider fan, thermostat, or sealed-system service.
- Water leaks indoors: check installation position, blocked drainage, damaged seals, and the manufacturer’s condensate design.
- Airflow remains weak: inspect the filter, evaporator surface, louvers, and fan area for remaining obstruction.
- Unit hums, sparks, or smells electrical: unplug it and stop using it until qualified service evaluates the appliance.
Repeated mold is not solved by perfume sprays. Repeated icing is not solved by removing the filter. An indoor leak should not be handled by drilling random holes through the base pan. Electrical odors require immediate shutdown rather than continued testing. Older units with several faults may be more economical to replace than repeatedly repair. Homeowners considering a larger upgrade can compare broader HVAC replacement costs in 2026.
How often should a window AC be cleaned?
Filter maintenance should happen more often than deep cleaning. The schedule below works as a practical starting point, but the owner’s manual remains the controlling source.
- Check the filter about monthly during regular cooling use.
- Clean visible grille dust whenever buildup appears.
- Inspect indoor and outdoor coils before the main cooling season.
- Check drainage when water, odor, or persistent dampness appears.
- Perform a deeper inspection before seasonal storage.
A bedroom unit used 4 hours nightly has a different workload from an AC running all day in a Texas apartment. California wildfire smoke can also load filters differently from ordinary household dust. Pet hair increases debris around filters and intake grilles. Coastal humidity in Florida can make moisture management more important. A window unit near a busy street may collect soot faster. Condition matters more than an arbitrary calendar date.
FAQ
Can I spray water directly into a window AC unit?
Not indiscriminately. Filters and certain removable parts may be washable, but electrical controls, wiring, motors, and other components should not be soaked. Follow the model’s manual before applying water inside the cabinet.
How often should I clean a window AC filter?
GE recommends checking many room air-conditioner filters every 30 days and cleaning them when necessary. Homes with pets, smoke, construction dust, or heavy AC use may require shorter intervals.
Can mold inside a window AC make the room smell?
Yes. Moisture combined with organic debris can support mold growth and create musty odors. EPA guidance focuses on removing contamination from appropriate surfaces and correcting the moisture source that allowed growth.
Should I use bleach to clean mold from a window AC?
Do not assume bleach is appropriate for the appliance. EPA guidance for hard surfaces emphasizes detergent, water, and thorough drying, while individual AC manufacturers may restrict stronger chemicals. Mixing household cleaners can also create dangerous fumes.
Why does my window AC freeze after I clean the filter?
A clean filter removes one common airflow restriction, but icing can have other causes. A dirty evaporator, weak fan, blocked airflow, temperature-control problem, or refrigerant-system fault may require further diagnosis.
When should a professional clean or repair the unit?
Professional service makes sense when mold extends into inaccessible components, coils are heavily clogged, electrical damage appears, or icing returns after airflow problems are corrected. Persistent indoor leaking, oily coil residue, unusual motor noise, or failure to cool also moves the problem beyond routine cleaning.
Earlier we wrote about Peel-and-Stick vs Traditional Wallpaper 2026: Which Is Better for Apartments?