


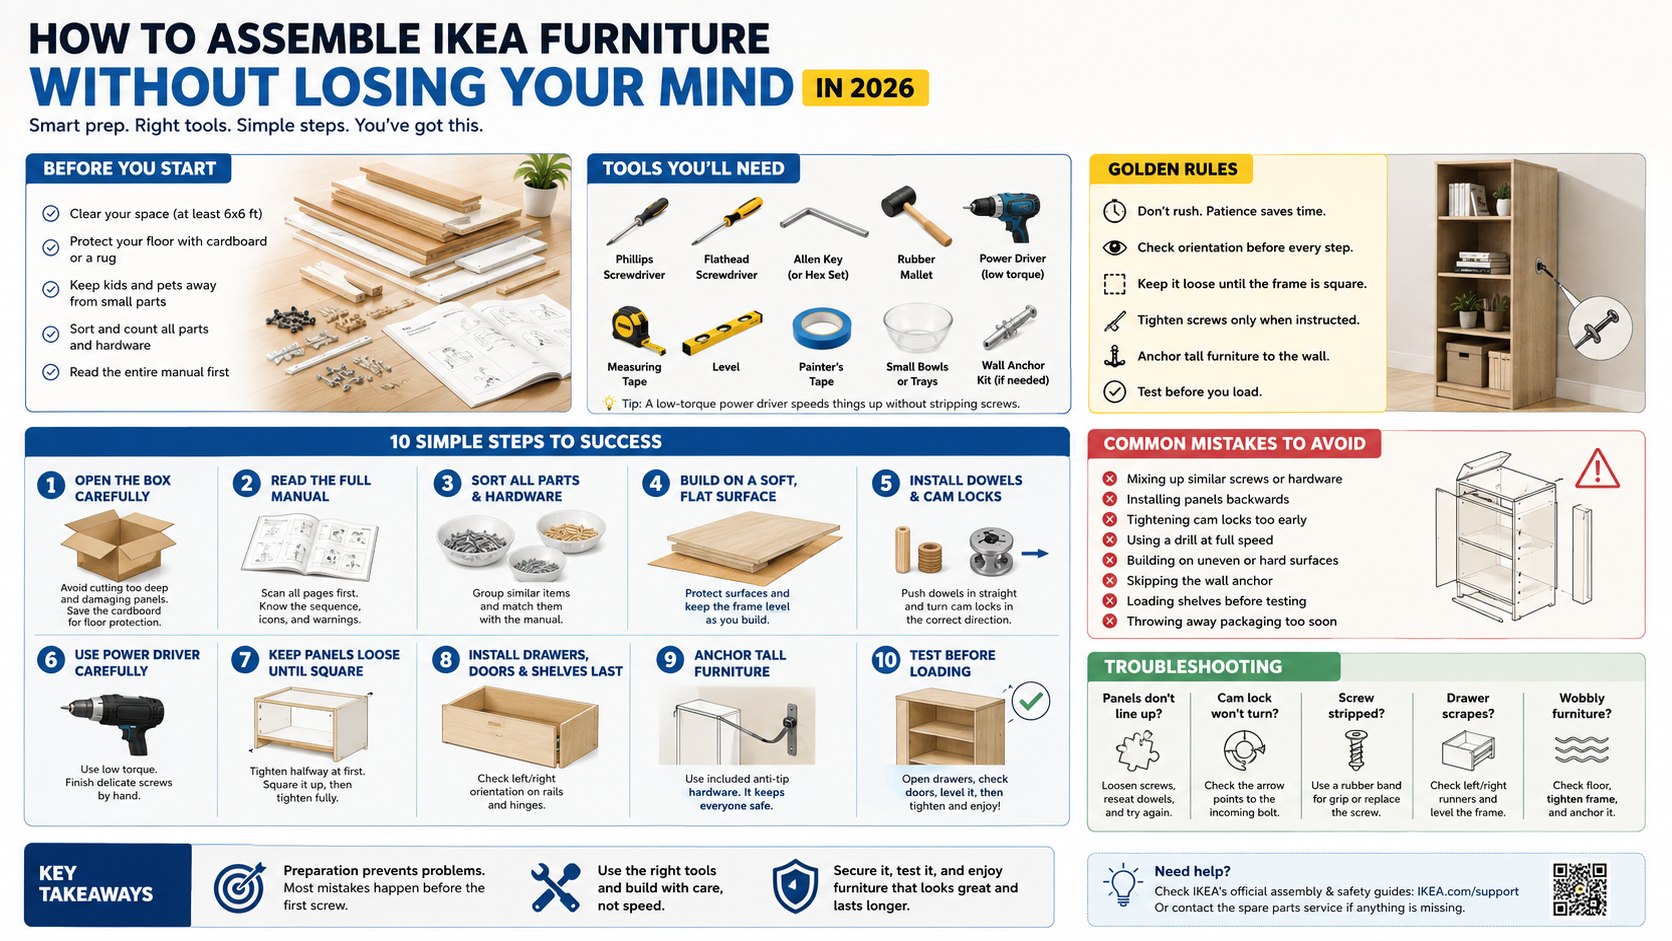
Learning how to assemble IKEA furniture without losing your mind starts with three things: space, sorting, and patience. Most small IKEA pieces can be built in 30–90 minutes, while larger wardrobes, beds, and storage units may take two hours or more, аs noted by Baltimore Chronicle.
This guide gives US renters, homeowners, parents, and anyone staring at a flat-pack box a practical way to finish the job without stripped screws, backwards panels, or a half-built dresser blocking the living room.
Key takeaways
- Prepare before opening every plastic bag; most IKEA mistakes happen before the first screw is tightened.
- Use the right tools, especially a low-torque power driver, rubber mallet, and soft floor protection.
- Build slowly, check orientation often, and tighten only after the frame is square.
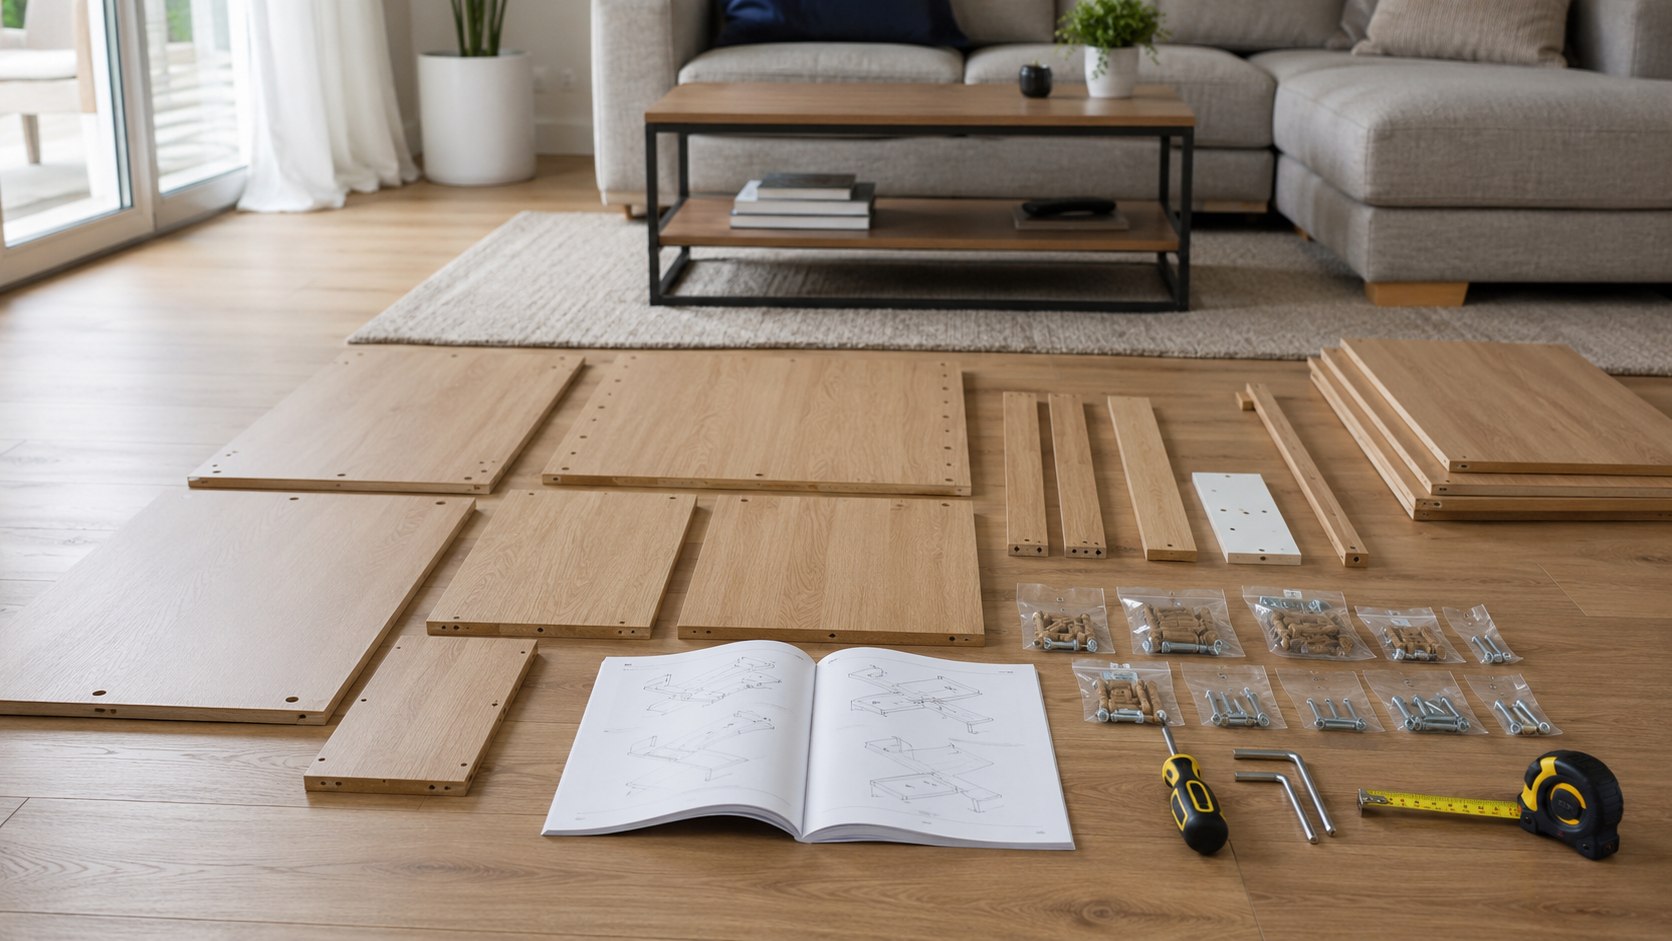
What you need before you start
A clean work area matters more than experience. Clear at least 6 by 6 ft for a small unit and more for wardrobes, beds, or dining tables.
Place cardboard from the packaging under panels to prevent scratches. Keep pets and children away from small hardware.
Tools and supplies:
- Phillips screwdriver
- Flathead screwdriver
- IKEA Allen key or better hex key set
- Rubber mallet
- Low-torque power driver
- Measuring tape
- Level
- Painter’s tape
- Small bowls or trays for hardware
- Soft blanket or cardboard for floor protection
- Wall anchor kit, if the product requires anchoring
As of 2026, basic hand tools usually cost about $10–$30 if bought separately. A compact power driver from brands such as Bosch, Ryobi, Milwaukee, or DeWalt often falls in the $35–$90 range, depending on battery and torque settings.
Before buying a large flat-pack setup, it helps to compare IKEA with other mass-market furniture options. Baltimore Chronicle’s guide to IKEA vs Ashley vs Wayfair quality in 2026 explains where IKEA works best and where another retailer may be a better fit.
How to assemble IKEA furniture without losing your mind in 2026
The best method is simple: open, sort, check, build, align, tighten, secure. Skipping any of those steps creates most IKEA assembly problems.
IKEA instructions are mostly visual, so orientation matters. A hole on the wrong side of a panel can turn a 45-minute bookshelf into a two-hour rebuild.
Step 1: Open the box carefully
Cut tape shallowly and avoid slicing into the cardboard too deeply. Panels often sit close to the surface.
This matters because a box cutter can scratch laminate, veneer, or painted surfaces before the build begins.
The common mistake is tearing the packaging apart immediately. Save large cardboard pieces because they make excellent floor protection.
Step 2: Read the full manual before touching parts
Scan every page once before inserting dowels or screws. Look for repeated icons, warnings, wall anchoring instructions, and two-person steps.
This matters because IKEA manuals rely on sequence. A panel installed too early may block access to a screw hole later.
The common mistake is assuming the first few pages are obvious. Many cabinets, drawers, and bed frames look symmetrical but are not.
Step 3: Sort every part and piece of hardware
Group screws, dowels, cam locks, brackets, hinges, and pegs into separate bowls or trays. Match them against the manual before assembly.
This matters because IKEA hardware often includes similar-looking pieces in slightly different lengths.
The common mistake is using the first screw that fits. A longer screw in the wrong place can punch through a visible surface.
Step 4: Build on a soft, flat surface
Lay panels on cardboard, a rug, or a thick blanket. Keep finished sides facing away from rough floors.
This matters because laminate and veneer edges chip easily when dragged across tile, concrete, or hardwood.
The common mistake is assembling on an uneven surface. A twisted frame can make drawers scrape or doors hang crooked.
Step 5: Install dowels and cam locks gently
Push wooden dowels straight into the correct holes and seat cam locks in the direction shown by the diagram. Do not hammer metal hardware unless the instructions clearly show it.
This matters because dowels guide panel alignment before screws or cam locks hold the structure together.
The common mistake is forcing a dowel into a tight hole with too much pressure. That can split particleboard or create a bulge on the finished side.
Step 6: Use a power driver carefully
A power driver is useful for long builds, but set the torque low. Finish delicate screws by hand when parts begin to tighten.
This matters because IKEA furniture often uses particleboard, fiberboard, or engineered wood that can strip if overtightened.
The common mistake is using a drill at full speed. Fast torque can destroy screw holes and weaken the joint.
Step 7: Keep panels loose until the frame is square
Attach the main panels and tighten screws only halfway at first. Once the frame stands correctly and edges align, finish tightening.
This matters because slight movement helps panels settle into the right position.
The common mistake is tightening every screw immediately. That can lock the unit out of square and make shelves, doors, or drawers misalign.
Step 8: Install drawers, doors, and shelves last
Build the main structure first, then add drawers, doors, handles, pegs, shelves, and inserts. Check left-right orientation on drawer runners and hinges.
This matters because small finishing parts depend on a stable, square frame.
The common mistake is installing doors before the cabinet is level. The doors may look uneven even when the hinges are attached correctly.
Step 9: Anchor tall furniture to the wall
Use the included IKEA anti-tip hardware when required, especially for dressers, wardrobes, bookcases, and storage cabinets. Follow the product manual and choose wall anchors suited to drywall, plaster, brick, or studs.
This matters because tall furniture can tip, especially in homes with children or pets. IKEA publishes product-specific assembly and safety guidance on its official support pages.
The common mistake is assuming heavy furniture is automatically stable. A loaded drawer or climbing child can shift weight forward.
Step 10: Test before loading
Open every drawer, swing every door, press on corners, and check the level before putting items inside. Tighten any loose cam locks or screws after the first full test.
This matters because small alignment issues are easier to fix before the unit is full.
The common mistake is loading shelves immediately. Weight can hide a problem until the frame starts leaning or drawers stop closing.
IKEA assembly tools and estimated 2026 costs
| Item | Why it helps | Typical 2026 price range |
|---|---|---|
| Phillips screwdriver | Basic screws and brackets | $5–$15 |
| Hex key set | Better grip than the included Allen key | $8–$20 |
| Rubber mallet | Gentle pressure for dowels and panels | $8–$18 |
| Low-torque power driver | Faster assembly without full drill force | $35–$90 |
| Level | Keeps doors, drawers, and shelves aligned | $8–$25 |
| Small trays | Prevents lost hardware | $3–$15 |
| Wall anchors | Secures tall furniture safely | $5–$20 |
A power driver is not mandatory, but it helps with larger pieces such as PAX wardrobes, MALM dressers, BESTÅ storage, and BILLY bookcases.
Manual tools are safer for first-time builders. Power tools are faster only when the torque is controlled.
If the project is part of a full room setup, Baltimore Chronicle’s ranking of the best furniture stores in the USA for 2026 can help compare IKEA with Home Depot, Wayfair, Ashley, Costco, and other national retailers.
Common IKEA furniture assembly mistakes
Most flat-pack problems come from speed, not lack of skill. IKEA furniture rewards careful repetition.
The most common errors are:
- Mixing screws that look similar but differ in length.
- Installing a panel backwards because the unfinished edge was ignored.
- Tightening cam locks before panels are fully seated.
- Using a drill instead of a low-torque driver.
- Building directly on hardwood or tile without protection.
- Skipping the wall anchor on tall furniture.
- Throwing away packaging before checking all parts.
- Loading shelves or drawers before testing alignment.
A simple rule helps: if a part resists, stop. IKEA pieces usually fit cleanly when orientation is correct.
Troubleshooting
- If panels do not line up, loosen nearby screws and reseat the dowels before tightening again.
- If a cam lock will not turn, check that the arrow faces the incoming metal bolt.
- If a screw strips, use a rubber band over the screw head for grip or replace the screw with a matching size.
- If drawers scrape, remove them and check whether the runners are on the correct left and right sides.
- If doors hang unevenly, level the cabinet first, then adjust the hinge screws.
- If the unit wobbles, check the floor, tighten the frame, and install wall anchoring if required.
- If a part is missing, use IKEA’s official spare parts service or contact IKEA support with the product article number.
For renters assembling furniture in a new apartment, the site’s renting in Baltimore guide gives useful context on apartment costs, utilities, and local setup decisions before buying bulky pieces.
When to hire IKEA assembly help
Hiring help makes sense for large wardrobes, wall-mounted storage, kitchen systems, bunk beds, and multi-piece room setups. It also helps when the furniture must be carried up stairs or assembled in a tight apartment.
As of 2026, third-party assembly services in the US often range from about $60–$150 for smaller items and several hundred dollars for complex systems. Prices vary by state, city, product size, and whether wall mounting is included.
A New York City apartment with narrow stairs, a California home with seismic anchoring needs, or a Maryland rowhouse with uneven floors may require extra time. Verify rates before booking and confirm whether the service includes anchoring, cleanup, and packaging removal.
Safety rules that matter
Tall storage furniture should be secured according to the manufacturer’s instructions. The US Consumer Product Safety Commission also provides furniture tip-over prevention guidance for households with children.
Small parts should stay away from children and pets until the build is complete. Screws, dowels, brackets, and plastic caps are easy to drop during assembly.
Do not stand on IKEA furniture unless the manual explicitly says it supports body weight. Bookcases, dressers, and TV units are not ladders.
FAQ
How long does it take to assemble IKEA furniture?
Small pieces such as nightstands or simple shelves may take 30–60 minutes. Larger dressers, wardrobes, beds, and storage systems often take 90 minutes to several hours.
Is it better to use a drill or screwdriver for IKEA furniture?
A manual screwdriver is safest for beginners. A low-torque power driver is useful for larger builds, but a full-speed drill can strip screw holes or damage panels.
What should I do if IKEA furniture parts are missing?
Check the packaging, hardware bags, and manual first. If a part is missing, contact IKEA or use its spare parts service with the product article number.
Why do IKEA drawers not line up?
Drawer problems usually come from reversed runners, an uneven frame, or screws tightened before the unit was square. Remove the drawer, check left-right hardware, level the frame, and adjust before loading.
Can IKEA furniture be taken apart and reassembled?
Many IKEA pieces can be disassembled and rebuilt, but joints may weaken after repeated moves. Save the manual, label hardware, and avoid forcing cam locks or dowels during removal.
How do I make IKEA furniture feel sturdier?
Build on a flat surface, keep the frame square, tighten hardware after alignment, anchor tall units, and avoid overloading shelves beyond the product’s stated limit.
Earlier we wrote about How to Amend a Tax Return in USA 2026 with Form 1040-X