

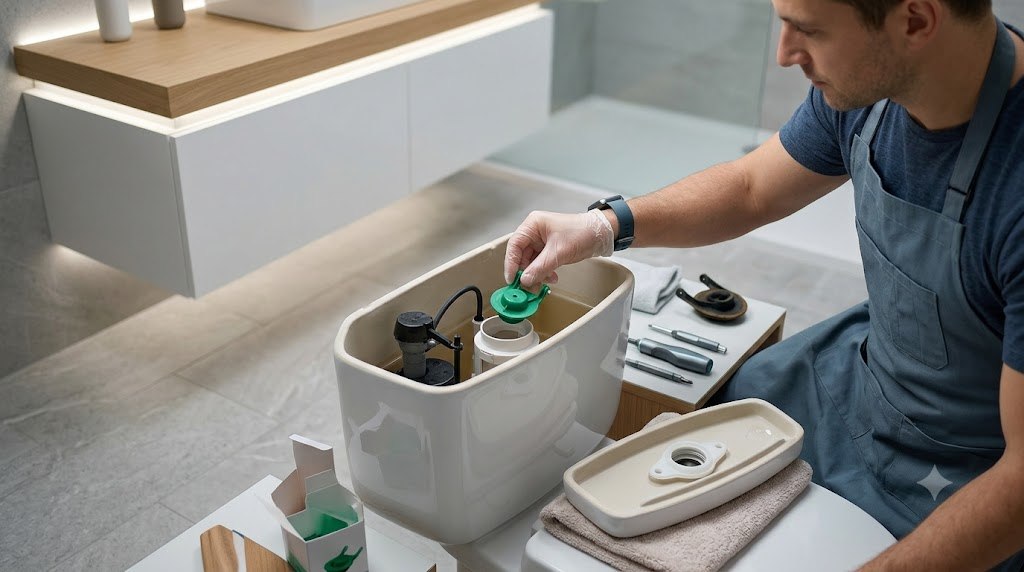
How to replace a toilet flapper is a 15-to-30-minute repair that can stop a running toilet without removing the tank or bowl. Shut off the water, identify whether the flush valve is 2 or 3 inches, install a matching flapper, and adjust its chain until the valve seals correctly, as noted by the Baltimore Chronicle editorial team.
A basic replacement usually costs $5 to $16 in 2026. No plumbing license or specialty equipment is needed for a standard installation. The most important decision is not the brand or color. It is choosing a flapper that fits the flush valve and matches the toilet’s flushing volume.
Key takeaways
- Measure the flush valve before buying because a 2-inch flapper cannot properly seal a 3-inch opening.
- Leave about 1/2 inch of slack in the chain so the flapper closes without restricting the handle.
- Replace the flapper only after confirming the leak is inside the tank rather than around the toilet base.
A worn seal often causes the tank to refill by itself, sometimes called ghost flushing. A tangled chain can also hold the flapper slightly open. If water appears on the floor instead, investigate the supply line, tank bolts, or bowl seal.
Water around the bottom of the bowl requires a different repair. Follow this guide to fix a leaking toilet base before replacing parts inside the tank. A flapper cannot correct a damaged wax ring or closet flange.
What you need
Gather the replacement part before shutting down the toilet. Most households can complete the job with tools already stored in a kitchen drawer or basic toolbox.
- A compatible 2-inch, 3-inch, or model-specific toilet flapper
- Rubber gloves
- Small bucket or absorbent towel
- Sponge for removing remaining tank water
- Tape measure or ruler
- Scissors or needle-nose pliers for an oversized chain
- Food coloring for the final leak test
- 15 to 30 minutes of working time
- About $5 to $16 for a standard replacement in 2026
An adjustable wrench is normally unnecessary because most flappers attach to plastic mounting ears. Keep one nearby if the shutoff valve handle is stiff, but do not force an old valve. Corroded valves can begin leaking when disturbed.
Renters should report a constantly running toilet to the landlord or property manager. A simple flapper change may be allowed, but written approval avoids disputes over fixtures or water damage. Maintenance responsibility depends on the lease and applicable state law.
Take a clear photograph of the tank before removing anything. The image preserves the original chain position, flapper orientation, and fill-valve arrangement.
How to choose the correct toilet flapper size and fit
The opening beneath the flapper is the flush valve. Most US toilets use either a standard 2-inch valve or a larger 3-inch valve. Some Kohler, American Standard, Mansfield, TOTO, Glacier Bay, and dual-flush models use proprietary seals or canister systems instead.
Measure the opening after lifting the existing flapper. A hole roughly the size of a baseball is usually 2 inches. An opening closer to the width of a softball is normally 3 inches. Measure the valve itself rather than the flexible rubber edge.
| Flush system | How to identify it | Typical 2026 part price | Best replacement approach |
|---|---|---|---|
| 2-inch flapper | Common on many older and standard toilets | $5–$12 | Use an adjustable universal 2-inch flapper |
| 3-inch flapper | Common on newer 1.28 or 1.6 GPF toilets | $10–$16 | Choose a 3-inch adjustable or brand-matched model |
| Canister seal | Round tower lifts vertically during flushing | $7–$18 | Replace the seal listed for the toilet model |
| Dual-flush valve | Tank has 2 flush buttons or a split control | $12–$35 | Use the specified seal or complete valve assembly |
| Proprietary flapper | Unusual hinges, frame, shape, or mounting arms | $10–$30 | Match the tank model number with manufacturer data |
Prices vary by retailer, region, and package size. As of 2026, common Korky and Fluidmaster flappers are often available for less than $16. Brand-specific parts can cost more, especially when supplied as a complete valve kit.
Look inside the tank for a stamped model number. It may appear on the back wall or near the waterline. Search that exact number on the manufacturer’s support page if the existing mechanism does not resemble a conventional hinged flapper.
Universal does not always mean identical. Adjustable models control how long the flapper floats before closing. That setting affects both flush strength and water use, so retain the original setting whenever possible.
Homeowners planning more extensive plumbing or finish work can compare the repair with current bathroom remodeling costs in the USA. Replacing one tank component is usually preferable when the porcelain remains intact.
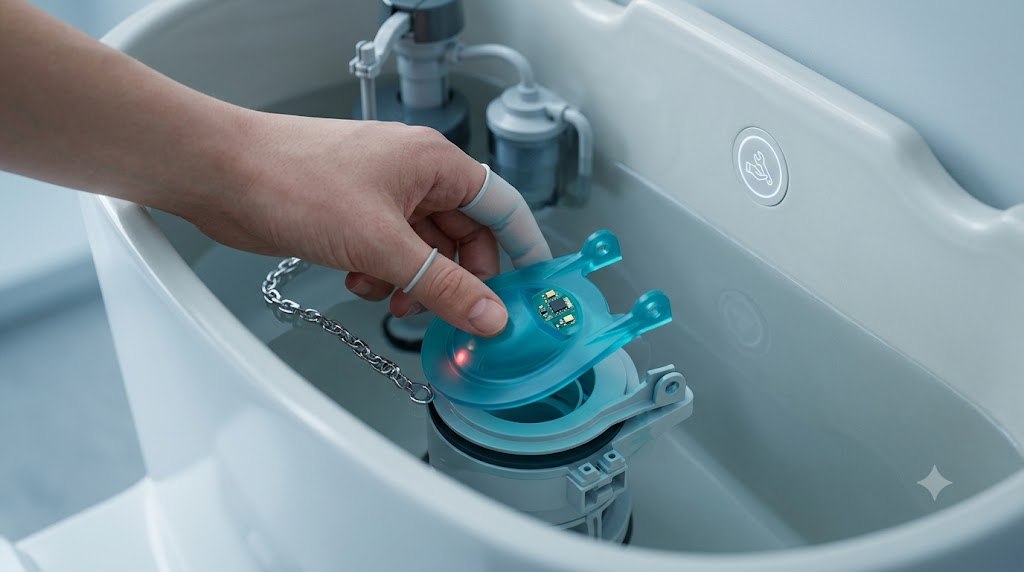
Step 1: Confirm that the flapper is leaking
Add several drops of food coloring to the tank without flushing. Wait 10 to 15 minutes. Colored water appearing in the bowl indicates that water is passing through the flush valve.
This test prevents replacing a working part when the actual problem is the fill valve. Avoid dark dyes that could temporarily stain worn or porous surfaces.
Step 2: Shut off the water supply
Turn the wall valve clockwise until it stops, then flush the toilet. Hold the handle down to drain as much tank water as possible.
Closing the supply keeps the tank empty while you work. Do not apply excessive force to a corroded or frozen shutoff valve.
Step 3: Photograph the existing setup
Take one image from above and another showing the chain connection. Note which handle-lever hole holds the chain clip.
The photographs make it easier to restore the original geometry. A frequent mistake is disconnecting several parts before recording their positions.
Step 4: Remove the old flapper
Unclip the chain from the flush lever. Slide the flapper’s rubber ears from the mounting posts on both sides of the valve.
Some units use a rigid ring that slides over the overflow tube. Do not pull against the fill valve, overflow tube, or brittle plastic fittings.
Step 5: Clean and inspect the flush-valve seat
Wipe the rim with a clean sponge or cloth. Remove slime, mineral residue, or fragments left by the deteriorated rubber.
A clean seat gives the replacement a flat sealing surface. Avoid abrasive pads or metal tools that could scratch the plastic.
Step 6: Attach the new toilet flapper
Connect both mounting ears to the valve posts. Center the rubber seal over the opening and verify that it moves freely.
A twisted or off-center flapper may leak immediately. Do not stretch one side farther than the other to force an incorrect fit.
Step 7: Connect and adjust the chain
Hook the chain to the same lever hole used by the old part. Leave approximately 1/2 inch of slack when the flapper is closed.
The chain needs enough movement to let the seal rest fully. Excess slack can tangle beneath the flapper, while a tight chain holds it open.
Step 8: Restore the water and test the flush
Turn the shutoff valve counterclockwise and allow the tank to fill. Flush 3 times while watching the flapper lift and reseat.
The valve should open promptly and close without bouncing. Do not replace the tank lid until the mechanism passes several tests.
Step 9: Fine-tune an adjustable flapper
Move the dial or float setting by 1 position at a time. Increase the open time for a weak flush and decrease it for double flushing.
Small changes preserve the toilet’s intended water volume. Avoid setting every adjustable model to its maximum opening time.
The correct fit creates a complete flush without forcing the user to hold the handle. It also closes before unnecessary water leaves the tank.
“Replacing a flapper is a normal home maintenance that needs to be done every five to ten years.”
Korky Toilet Repair, “How to Replace Toilet Flapper,” manufacturer troubleshooting guidance accessed in 2026.
Korky’s statement describes a broad maintenance interval, not a guaranteed service life. Water chemistry, disinfectants, hard-water deposits, heat, and product material all affect deterioration.
Troubleshooting after installing a new flapper
Most problems after installation come from the chain, alignment, or an incorrect replacement size. Watch one complete flush with the tank lid removed before buying another component.
- The toilet still runs: shorten excessive chain slack, center the seal, and inspect the valve rim for damage.
- The handle feels tight: add 1 or 2 chain links because the flapper may be under constant tension.
- The toilet double flushes: reduce the float setting so the flapper closes sooner.
- The flush is weak: increase the adjustable setting slightly and confirm the tank reaches its marked waterline.
- The chain slips under the seal: shorten it or move the clip to a better-aligned lever hole.
- The new part will not attach: verify whether the system needs a canister seal or manufacturer-specific assembly.
A flapper cannot repair a cracked flush valve. Inspect the plastic seat for a split, warped edge, or looseness. Replacing that assembly usually requires removing the tank from the bowl.
The fill valve may be responsible when water continuously enters the overflow tube. Lower the float or replace the fill valve according to its instructions. The flapper is not leaking when the tank water rises above the top of the overflow tube.
Mineral buildup can prevent an otherwise correct seal. White deposits are common in hard-water regions, including parts of Arizona, Nevada, Texas, and Southern California. Clean gently and avoid chemicals that are not approved for toilet-tank components.
For broader work involving flooring or water damage, review how to retile a bathroom yourself. Repairs around the toilet must address the subfloor before new finishes are installed.
When to call a plumber instead
Call a licensed plumber when the flush valve is cracked, the shutoff valve leaks, or a metal fitting begins to crumble. Professional help is also appropriate when the only toilet cannot remain unavailable during troubleshooting.
Labor charges vary substantially across the USA. A straightforward service visit may cost more in California, New York, Massachusetts, Washington, or central Maryland than in smaller Southern or Midwestern markets. Request a written estimate before authorizing work.
Stop the repair if the porcelain tank is cracked. Porcelain can fail suddenly after impact or uneven tightening. Replacing internal rubber parts will not make a damaged tank safe.
Owners of older toilets should also compare the cost of several repair parts with replacement. A functioning, compatible flapper remains the cheapest solution when the bowl and tank are otherwise sound.
FAQ
How do I know whether my toilet uses a 2-inch or 3-inch flapper?
Measure the flush-valve opening beneath the flapper. A standard opening is about 2 inches across, while many newer toilets use a larger 3-inch valve. Check the tank model number when the size remains unclear.
Can I replace a toilet flapper without turning off the water?
It is technically possible, but shutting off the supply is safer and easier. An empty tank provides better access and prevents continuous refilling while the flapper is disconnected.
Why does my new toilet flapper still leak?
The flapper may be misaligned, incorrectly sized, held open by the chain, or resting on a dirty valve seat. A cracked or warped flush valve can also prevent a reliable seal.
How much slack should a toilet flapper chain have?
Leave roughly 1/2 inch of slack when the flapper is closed. The chain should lift the seal immediately but remain loose enough for complete closure.
How much does a replacement toilet flapper cost in 2026?
Most standard 2-inch and 3-inch flappers cost about $5 to $16 in 2026. Proprietary seals, dual-flush components, and complete valve assemblies may cost $12 to $35 or more.
How long should a toilet flapper last?
Many last several years, but service life depends on material and water chemistry. Replace the part when it becomes warped, brittle, sticky, cracked, or unable to hold a seal.
Earlier we wrote about How to Get an IRS Transcript Online 2026: ID.me Verification in 7 Steps